The Agent Taps the Phone. Nothing Touches the Mac.
Writing code stopped being the expensive half; verifying it started. On iOS the last mile is a real device — and unlike Android, the platform does not simply let you in. Here is what it takes, and what it catches.
Agents write the code now. That part is largely settled — and it moved the bottleneck somewhere less comfortable.
Give an agent a feature in your iOS app and it will implement it, write the test, and run it. The loop closes cleanly right up to the only question anyone cares about — does this work on a phone? There it stops. Verifying is the expensive half now, and its expensive half has always been hardware. That is a schedule cost before it is anything else: every release waits on a person holding a phone, working the same checks by hand.
So the obvious move: let the agent drive the device too. Two walls stand in the way; the first is specific to iOS.
Why iOS device automation is harder than Android
On Android, a cable and a debugging switch are enough. The platform's own shell will inject a tap into any device you can plug in, including, on most OEMs, a phone you bought that morning. Nothing is signed and nothing is provisioned; one on-device prompt authorises your Mac's key, once, and the door stays open.
iOS has no equivalent door, and that is deliberate. Nothing on a physical iPhone accepts a synthetic tap from your Mac unless you have built and signed an automation agent with an Apple developer identity — a free personal one works, though its profile expires weekly — installed it onto that device, and kept a transport alive to reach it. The restrictions that make an iPhone hard to attack make it hard to drive, and no flag turns them off.
So it is easy to stop at the simulator — except that is exactly where the failures that matter refuse to occur. Two of mine are below.
No, the agent does not take over your mouse
Suppose you get past signing. Most people then reach for the model already in their head: the agent takes the mouse and clicks around like a fast intern.
I set out to prove that model wasn't what my own setup did, and got the wrong answer. I measured it the obvious way — read the macOS cursor position, inject a tap, read it again. Across five taps the cursor had moved hundreds of pixels.
Then I ran the control: sample the cursor twice over the same interval with no taps at all. It moved just as much. I was measuring my own hand on the mouse. The tool was never the cause, and the first measurement could not have told the difference.
The wrong answer is worth keeping, because most people accept it without checking. And if it were true — if automating a phone meant seizing the desktop and clicking the simulator window — the cost would be a business one: such a run cannot happen while you work, cannot be reproduced (window position, focus and resolution on the day), and cannot run twice at once. Never a release gate.
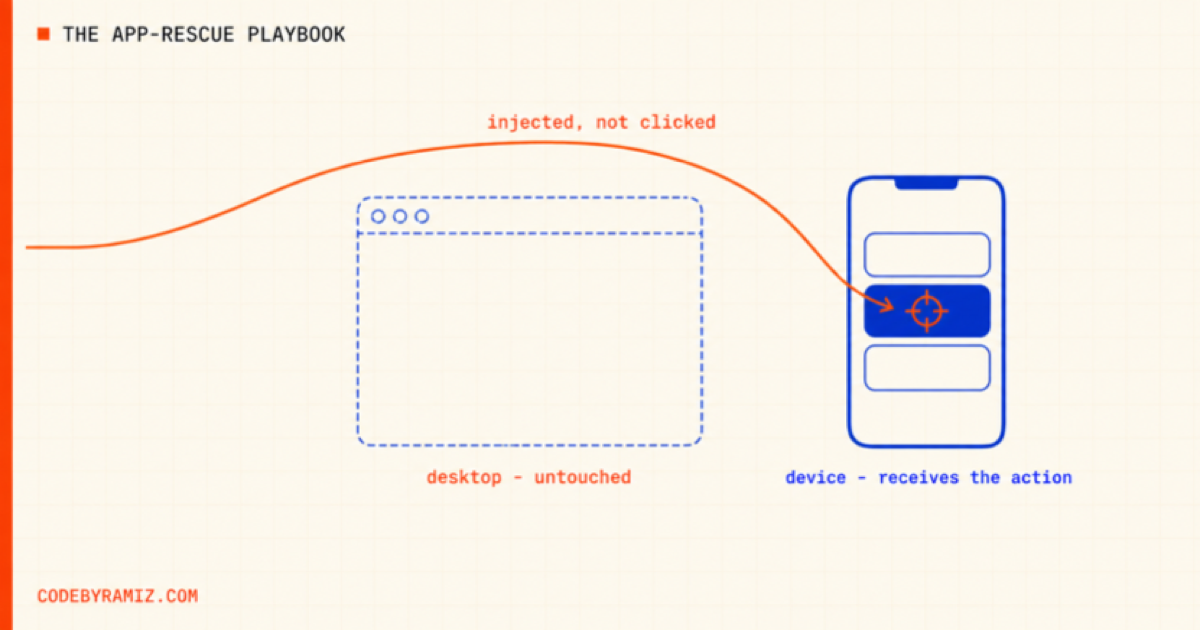
The way out sounds like a technicality and isn't: read the interface as data, and inject the event into the device.
What one injected tap actually looks like
The agent asks the device for its accessibility hierarchy — a JSON tree where every node carries a type, a label, and a frame:
{ "AXLabel": "General",
  "type":    "Button",
  "frame":   { "x": 16, "y": 293.33333333333331, "width": 370, "height": 52 } }
The tap target is arithmetic on this frame, not a pixel match: a label, a type and four numbers are the whole input.
No vision model, no pixel matching. The element is found by label, and the tap coordinate is arithmetic: x + width/2, y + height/2 → (201, 319.3333333333333). That value goes in as it is — AXe accepts the fraction — and is injected as a HID event.
The proof that the desktop is not involved is worth showing. I ran this with the UI on the Settings root — the screen the frame above came from — keeping a browser frontmost throughout:
# composed from: a frontmost-app query + axe describe-ui, before and after the tap
frontmost Mac app : Google Chrome
screen showing    : Settings
--- inject tap ---
frontmost Mac app : Google Chrome
screen showing    : General
Pointer-driven clicking does not produce that trace. To click a window, something must raise it, focus it, and move a pointer into it — which would have changed the first line. The browser held focus across the tap, and the screen changed anyway.
That trace is tier one: AXe drives simulators, so the tap above went into one. The mechanism generalises — read the tree, compute a frame centre, inject a HID event — and on hardware the same three steps run through a signed on-device agent instead. That is the whole trick; the rest is consequence.
The three tiers of iOS test automation
"An agent drives your iPhone" is true, and doing a lot of work in that sentence. It splits into three tiers that cost wildly different amounts to set up; day to day, almost all of it is tier one.
| Tier | What it drives | What it needs | What it's for |
|---|---|---|---|
| 1 | Simulator | Nothing beyond the toolchain | Daily work. Journeys, regressions, screenshots. Fast, disposable, parallel. |
| 2 | Physical device — management only | A cable or a pairing | Install, launch, enumerate state, collect device logs. No UI driving. |
| 3 | Physical device — full UI driving | A signed on-device automation agent, plus a live tunnel to it | Taps, swipes, element queries, screenshots on real hardware. |
Tier 3 is what people picture when they hear "drive my real iPhone" — but keep the device as a last-mile check, not a daily dependency.
How to do this yourself
Everything above is inert without commands. What follows is both loops end to end — tier one on the simulator, where most work belongs, then tier three on a physical iPhone: the same loop behind a rig you build once.
Find a simulator and get the interface as data. The tree comes from a small open-source utility, AXe, which injects HID events into the simulator rather than driving the desktop:
brew install cameroncooke/axe/axe
UDID=$(xcrun simctl list devices available -j | jq -r '..|objects|select(.name=="iPhone 17 Pro")|.udid' | head -1)
xcrun simctl bootstatus "$UDID" -b
xcrun simctl terminate "$UDID" com.apple.Preferences 2>/dev/null
xcrun simctl launch "$UDID" com.apple.Preferences
until axe describe-ui --udid "$UDID" > ui.json &&
      jq -e 'any(..|objects; .AXLabel=="General" and .type=="Button")' ui.json >/dev/null
do sleep 1; done
AXe is not in homebrew-core; it ships from its author's tap, hence the qualified formula name. bootstatus -b is safe to re-run — it boots a device if needed, else prints Device already booted, nothing to do. The terminate makes the rest repeatable: Settings resumes where it was last left, and the query below expects the root. Read the tree straight after a launch and you capture the transition, not the screen — poll for the element you need instead of sleeping a guess.
Find your element and compute its centre. Every node carries a frame, so the tap point is arithmetic — no vision model, no pixel matching:
read CX CY < <(jq -r '[.. | objects
        | select(.AXLabel=="General" and .type=="Button")]
       | first
       | "\(.frame.x + .frame.width/2) \(.frame.y + .frame.height/2)"' ui.json)
echo "$CX $CY"
# 201 319.3333333333333
Inject the tap, then re-read the tree to confirm what happened:
heading() { axe describe-ui --udid "$UDID" | jq -r '[.. | objects
  | select(.type=="Heading") | .AXLabel] | first'; }
BEFORE=$(heading)
axe tap -x "$CX" -y "$CY" --udid "$UDID"
echo "$BEFORE -> $(heading)"
# Settings -> General
That is the assertion, and the whole loop: read the tree, act on a frame, read it again. axe also does type, swipe, button, key, screenshot, and batch for an ordered sequence in one session.
AXe will also select by label — axe tap --label "General" --element-type Button --udid "$UDID" — but that is a shortcut, not the same operation: a selector tap lands on the element's activation point, the arithmetic above on its frame's geometric centre. Usually the same pixel; not always. Coordinates win outright — AXe ignores --label when -x and -y are supplied. When nothing matches it declines rather than guesses: No accessibility element matched … / No tap performed.
Three gotchas that will cost you an afternoon. Labels are neither unique nor stable across screens: drop the .type=="Button" constraint, run the query while Settings is already on the General screen, and it returns a Heading — same label, wrong element, wrong coordinate. Keep the constraint there and first finds nothing: jq: error … null (null) and number (2) cannot be divided. A loud miss beats a confident tap on the wrong element. Coordinates are points, not pixels — never scale them by the retina factor. And the tree is a snapshot: re-read it after every action.
Seed the state instead of automating your way to it. Most of the speed comes from here: a simulator hands you starting conditions that take twenty taps to reach on hardware.
xcrun simctl privacy "$UDID" grant photos com.yourcompany.yourapp
xcrun simctl addmedia "$UDID" fixture.jpg
xcrun simctl status_bar "$UDID" override --time 9:41 --cellularBars 4
xcrun simctl openurl "$UDID" myapp://deeplink/path
xcrun simctl io "$UDID" screenshot proof.png
Permission grants, seeded photos, deterministic status bars, deep links into the screen under test — no taps.
Tier two, on real hardware, uses Apple's own device tool and needs no signing beyond your normal build:
xcrun devicectl list devices        # names repeat — read the identifier column
DEVICE_ID=paste-the-identifier-here
xcrun devicectl device install app --device "$DEVICE_ID" Build.app
xcrun devicectl device process launch --device "$DEVICE_ID" com.yourcompany.yourapp
xcrun devicectl device info processes --device "$DEVICE_ID"
devicectl has no console subcommand — the log comes from a separate tool: log collect --device-udid "$DEVICE_ID" for a sealed archive, or a live streamer such as idevicesyslog. So this tier installs, launches, enumerates, logs. It taps nothing.
Tier three drives the phone itself. No Apple CLI taps a physical device: devicectl will not, AXe is simulator-only. The path that works is Appium's XCUITest driver, which builds and signs WebDriverAgent: a small app that runs on the iPhone and exposes an HTTP API, driving the UI from inside, where a synthetic event is allowed. The prerequisites are human — device unlocked (iOS has no PIN automation), trusted over USB, Developer Mode and UI Automation both on under Settings → Developer.
Install the client and driver, which bundles WDA and the tunnel:
npm i -g appium
appium driver install xcuitest
Then the tunnel. On recent iOS the old usbmux/lockdown route to developer services is gone — Appium's tunnel guide scopes this workflow to iOS 18 and later — and reaching those services needs a RemoteXPC tunnel over a TUN interface, which is why the first command needs root. Both are long-running: two shells, left up.
sudo appium driver run xcuitest tunnel-creation   # root; publishes a tunnel registry
appium                                            # the server, port 4723
The registry is what the driver probes. Check it and the server first:
curl -fsS http://localhost:42314/remotexpc/tunnels
curl -fsS http://127.0.0.1:4723/status
For CI, make that sudo passwordless — scoped to exactly that command, and re-checked after an nvm upgrade moves the interpreter path.
The session — the capabilities are where the day goes:
set -euo pipefail                 # one failed call must stop the rest, not carry an empty id
TEAM_ID=paste-your-team-id        # Xcode > Settings > Accounts; $DEVICE_ID from tier two

SID=$(curl -fsSX POST http://127.0.0.1:4723/session -H 'content-type: application/json' -d '{
  "capabilities": { "alwaysMatch": {
    "platformName": "iOS",
    "appium:automationName": "XCUITest",
    "appium:udid": "'"$DEVICE_ID"'",
    "appium:bundleId": "com.apple.Preferences",
    "appium:forceAppLaunch": true,
    "appium:shouldTerminateApp": true,
    "appium:xcodeOrgId": "'"$TEAM_ID"'",
    "appium:xcodeSigningId": "Apple Development",
    "appium:updatedWDABundleId": "com.yourcompany.wda",
    "appium:wdaLocalPort": 8101,
    "appium:allowProvisioningDeviceRegistration": true,
    "appium:wdaLaunchTimeout": 180000 } } }' | jq -er .value.sessionId)
xcodeOrgId is your team. A free personal one signed WDA here — but Appium documents automatic provisioning as paid-account territory, so on a free team expect to open the bundled WDA project in Xcode once, set the team by hand and build it to the phone yourself first. After that a create installs WDA in a minute or two; later ones are quick. Pick a free wdaLocalPort: 8100 is occupied often enough to cost you an afternoon.
Then it is the tier-one loop again in another dialect:
API="http://127.0.0.1:4723/session/$SID"

# establish the state, do not assume it: Settings can restore a prior pane
at_root() { curl -fsS "$API/source" | jq -er .value \
  | grep -q 'NavigationBar type="XCUIElementTypeNavigationBar" name="Settings"'; }
app() { curl -fsSX POST "$API/appium/device/$1_app" -H 'content-type: application/json' \
  -d '{"bundleId":"com.apple.Preferences"}'; }
# an if-block, not `a || { b; }` — errexit is suspended inside a || compound,
# so a failed terminate there would sail on into activate
if ! at_root; then
  app terminate; app activate; sleep 2
  at_root || { echo "not at the Settings root"; exit 1; }
fi

EID=$(curl -fsSX POST "$API/element" -H 'content-type: application/json' \
  -d '{"using":"accessibility id","value":"General"}' | jq -er '.value|to_entries[0].value')
read -r X Y < <(curl -fsS "$API/element/$EID/rect" \
  | jq -er '"\((.value.x + .value.width/2)|floor) \((.value.y + .value.height/2)|floor)"')

# two routes to the same row — take one; the first tap changes the screen,
# which is why the rect above was read while the row was still there
if [ "${TAP_BY:-selector}" = selector ]; then
  curl -fsSX POST "$API/element/$EID/click" -H 'content-type: application/json' -d '{}'
else
  curl -fsSX POST "$API/actions" -H 'content-type: application/json' -d '{"actions":[
    {"type":"pointer","id":"finger1","parameters":{"pointerType":"touch"},"actions":[
      {"type":"pointerMove","duration":0,"x":'"$X"',"y":'"$Y"'},
      {"type":"pointerDown"},{"type":"pause","duration":50},{"type":"pointerUp"}]}]}'
fi

curl -fsS "$API/source"                                # the tree, as XML this time
curl -fsS "$API/screenshot" | jq -er .value | base64 -d > proof.png
curl -fsSX DELETE "$API"                               # a leaked session holds the device
The three app capabilities force a cold launch — though Settings can still restore its last pane, which is why the first call reads the tree instead of assuming the root. Here is that loop's own output, captured from an iPhone on the run that produced this section:
# POST /session — the response, identifiers redacted
{"value":{"capabilities":{"platformName":"iOS","automationName":"XCUITest",
  "platformVersion":"26.6","bundleId":"com.apple.Preferences","wdaLocalPort":8101,
  ... },"sessionId":"030855ab-a899-4eac-8879-456550b4cbe9"}}

# the guard, on a session that opened straight into a saved pane
NavigationBar name="General"                           # before
{"value":true}{"value":null}                           # terminate_app, activate_app
NavigationBar name="Settings"                          # after — now at the root

# GET /source — the root screen, and the row we are aiming at
<XCUIElementTypeNavigationBar name="Settings" x="0" y="59" width="393" height="106">
<XCUIElementTypeStaticText name="General" x="29" y="700" width="103" height="30"/>

# POST /element then GET /element/$EID/rect
{"value":{"y":700,"x":29,"width":103,"height":30}}     # centre → (80, 715)

# POST /actions, the pointer payload above with x=80 y=715
{"value":null}

# GET /source again, same session
<XCUIElementTypeNavigationBar name="General" x="0" y="59" width="393" height="54">
The claim this proves: the coordinate came from the phone's own tree and the tap landed on hardware. The navigation bar reads Settings before and General after, with one HTTP request in between and no pointer anywhere.
One standing tax: a free team's profile expires weekly, so WDA has to be rebuilt and re-signed on that cadence. The registration capability only covers registering the device — it does not renew anything.
So: build the loop on the simulator where iteration is free, keep assertions and artifacts identical, then point the same journey at hardware for the last mile. If tier one is solid, tier three is a target change, not a rewrite.
What a real iPhone caught that the iOS Simulator could not
If tier 3 never catches what tier 1 misses, it is a demo, not a tool. Two cases from a batch image-processing app.
The batch that had to survive being backgrounded. The feature: pick fifteen photos, start a resize, and the work must not die when the user switches apps. The agent selected fifteen real images through the system picker, started the run, backgrounded the app programmatically twice while the batch was in flight, and let it finish. Read off the screen, progress advanced 11 of 15 → 12 of 15 across a controlled ten-second background window, and ended at 15 of 15.
The result that mattered was not on the screen. It was in the device log:
idevicesyslog -u "$DEVICE_ID" > syslog.txt       # captured across the whole run

$ grep -c 'expiration handler that has not been called' syslog.txt
0
$ grep -c '0x8badf00d' syslog.txt                # the background-watchdog kill signature
0
$ grep -c 'App transitioned to background' syslog.txt
2
The claim this proves: the app backgrounded twice and was not quietly killed for holding an assertion too long. 0x8badf00d is the signature iOS stamps on a process it terminated by watchdog, and an unfired expiration handler is the mistake that earns it. Both are zero here. The batch finished because it was allowed to.
A simulator cannot produce that evidence because it does not enforce it: no background watchdog, no memory-pressure eviction. The same run would have gone green and proved nothing.
The purchase flow the simulator could not verify at all. On a recent simulator runtime the harness that fakes a store session stopped working. The suite probes for that and refuses to pretend, so the purchase tests did not fail — they stood down:
** TEST SUCCEEDED ** — Executed 160 tests, with 4 tests skipped and 0 failures

# the same log, higher up — the suite all four came from, and one of them:
Test Suite 'StoreKitProStoreTests' passed
  Executed 4 tests, with 4 tests skipped and 0 failures (0 unexpected)

StoreKitProStoreTests.swift:12: -[StoreKitProStoreTests testPurchaseFlipsOwnershipAndRestoreFindsIt] :
  Test skipped - SKTestSession is not functional on this simulator runtime
  (StoreKit2 Product.purchase did not complete within 30s).
The summary line does not name them; the lines above it do — one suite, all four of its tests, with the probe's reason attached.
What that artifact says, and what it does not: the green result is honest but hollow on one path. Four tests covering purchase and restore did not run, and TEST SUCCEEDED in a CI summary reads as "the money path is fine" to anyone who does not open the log.
The failure was in the runtime, not the app — but a simulator-only policy can neither establish that nor verify the path; both need real hardware and a store account. Opposite to the first case: hardware is the only place left to check what the simulator quietly stopped checking.
What still needs real hardware, or a human
The list of things that cannot move to a simulator is shorter than people fear and longer than the hype admits: camera capture, Bluetooth and NFC, real biometrics, real push wakeups — a notification that has to launch a suspended process and run its service extension under real system pressure, not the payload delivery xcrun simctl push simulates — and any handoff to a third-party app absent from a simulator. Almost everything else has a seam and belongs in tier one.
Two limits bound the word "autonomously". The agent can only reliably touch what the accessibility tree exposes; an element with no label is nearly invisible to it — so the automation and a blind user's experience of your app fail in the same places, at the same time.
And "human-like" means taps, typing, swipes, and reading the interface as data — not judgement. Something still has to decide what the run was meant to prove and whether the evidence proves it. The background-task run above ended on a system prompt asking to write fifteen images into a real photo library; the right call was to stop and let the completed count and clean log stand as proof, rather than have an agent tap "Allow" on someone's photos. That decision was not automatable, and shouldn't be.
Closing the loop: letting an agent verify on real devices
An agent can write the feature and the test; what it could not do was tell you the thing works on hardware. That gap is why "it passes locally" and "it works on my users' phones" are still two different claims in iOS work.
What closes it is not the tapping. It is that this automation leaves something behind: a log, a screenshot, a completion count — an artifact someone can check later without taking anyone's word for it, the agent's included. And automation that reads the interface as data and injects into the device runs unattended, in parallel, as often as you like.
Which matters most for the apps I get called about: inherited codebases where the suite is green and nobody believes it, and every check that exists needs a specific person with a specific phone. The fix is not more confidence. It is receipts, produced by something that does not tire of producing them.
Ramiz Raja is a senior mobile developer and technical lead with 12+ years shipping and rescuing production apps on Android, iOS, and Flutter. More at codebyramiz.com.